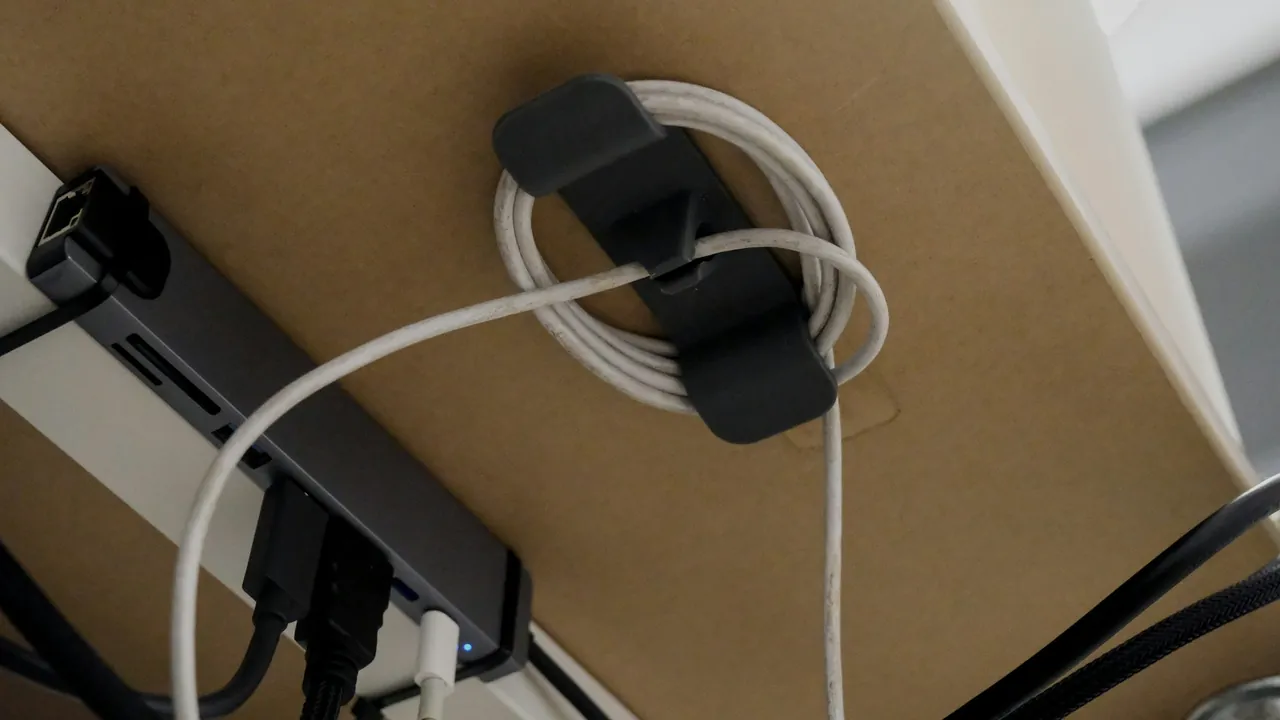
 Photo: Bedirhan Gül / Unsplash
Cable Management Under Desk: A Step-by-Step Guide for About $50
Hide the cable spaghetti under your gaming desk with a tray, reusable ties and a certified surge protector, safely and for around $50.
QUEST LOG 9 STEPS
MISSION BRIEFINGHide the cable spaghetti under your gaming desk with a tray, reusable ties and a certified surge protector, safely and for around $50.
This article contains affiliate links.
Here's how to get every cable off the floor and under your desk for around $50, without adding fire hazards along the way. This cable management under desk method works on any gaming desk, fixed or standing. For the bigger picture of planning your space, start with our budget gaming setup guide.
At a glance
- Safety comes before looks. Plug a surge protector with a UL, ETL or CSA mark straight into the wall, never chain power strips, and never run cords under a rug.
- The core kit is small: a surge protector, an under-desk tray, reusable hook-and-loop ties and a few adhesive clips.
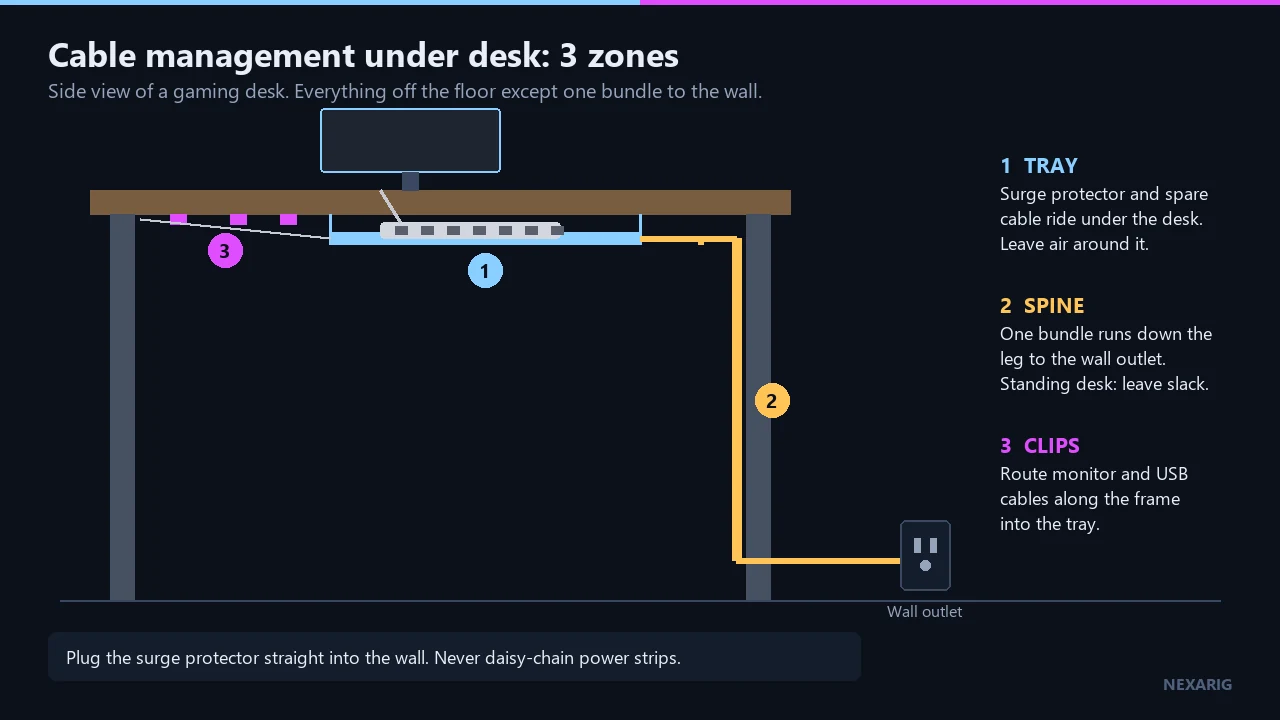
- Work in zones: power on the tray, a vertical path down to the floor, and clips on the desk surface.
- Standing desk? Leave slack and test the full height range before you trim anything.
- Budget: the essentials land around $50 at time of writing, and well under if you already own a surge protector.
The around-$50 shopping list
Prices below come from manufacturer or retailer pages we checked on September 25, 2026. They move often, so treat them as ballpark figures.
| Item | Role | Indicative price |
|---|---|---|
| Belkin 6-outlet surge protector BE106000-06 (720 joules, 330V clamping voltage, UL 1449 per Belkin) | Central power hub for the whole desk | Around $16 at time of writing |
| Scanfield adhesive under-desk cable tray (2-pack) | Holds the surge protector and excess cable off the floor | Around $32 at time of writing (non-Amazon retailer) |
| VELCRO Brand ONE-WRAP reusable ties (8" x ½") | Bundles cables without cutting anything | Check current price |
| Command Cord Bundlers | Adhesive clips to guide cables along the desk | Around $4 per pack at time of writing |
Adhesive trays rely on a clean, smooth underside. On particleboard, textured or heavily loaded desks, a clamp-on or screw-in tray is the safer choice. Check the tray's weight rating before loading a surge protector into it.
Add it up and the surge protector, tray and clips come to around $52, plus the ties, so this kit lands slightly over $50 at time of writing. If you need to trim, save on the tray or the clips, not on the surge protector.
Already own a surge protector? Swap it out of the list and put the money toward a 10 ft Alex Tech split cable sleeve (1") (check current price) for the vertical run from desk to floor.
Optional upgrade: Scandinavian Hub clamp-on cable trays, useful if you would rather not use adhesive under your desk; check current price. An adhesive J channel raceway along the back edge of the desk, or a cable box that hides a power strip on the floor, can also help, but neither is needed for this build.
Safety first
Cable management moves power hardware around, so a few rules are non-negotiable:
- Use a surge protector with a UL, ETL or CSA mark and check its joule rating. The joule figure (720 J on the Belkin above) is printed on the box. UL Solutions also notes that a lower clamping voltage means better protection. Consumer safety guidance from the U.S. Consumer Product Safety Commission (CPSC) points to certified products (UL, ETL or CSA marks).
- Plug it directly into a wall outlet. No daisy-chaining: never plug a power strip into another power strip or into an extension cord. UL's guidance for relocatable power taps says the same, and in workplaces daisy-chaining breaks OSHA rules, according to the U.S. Office of Congressional Workplace Rights.
- Never run cords under a rug, carpet, door or furniture. Both the CPSC and UL Solutions are explicit about this.
- Don't box in the heat. Leave air around power adapters and bricks (Apple's safety guidance, for example, warns against covering them), and don't stack power strips on top of each other in a tray.
- A warm cord is a warning sign. The CPSC notes that a hot cord signals overload. Unplug some devices and replace any damaged cord instead of taping it.
For scale, a CPSC and ESFI fact sheet from around 2009 estimated about 2,000 residential fires and 60 deaths a year linked to electrical cords and receptacles. The figures are old, but the lesson has not changed.
Cable management under desk, step by step
Step 1: Unplug everything and take inventory
Power down and unplug everything at the wall, then pull the desk slightly away so you can reach the back. List what actually needs power and data (PC, monitors, speakers, lamp, chargers, console) and retire cables you no longer use.
Step 2: Group cables by type
Sort cables into families: power, display, USB and audio. Power cords go to the tray; data cables stay on the desk surface or run along the back edge. Separate bundles make future upgrades faster.
Step 3: Install the under-desk tray
Clean the underside of the desk before applying an adhesive tray, or use a clamp-on tray if your desktop is thick enough and you want to avoid adhesive. Place the tray toward the back of the desk, where it is hidden but still reachable. Before committing, check that it won't collide with drawers, legs or a standing desk's frame.
Step 4: Centralize power
Set the surge protector in the tray and run its single cord to a wall outlet. Plug each device into it, keeping bulky adapters spaced out so air can circulate around them. Aim for one power hub per desk rather than several scattered strips.
Step 5: Bundle with hook-and-loop ties, not zip ties
Wrap excess length into loose loops and secure them with reusable ties. VELCRO Brand's ONE-WRAP ties are reusable, unlike plastic zip ties, which you have to cut every time you change a cable. Keep the bundles loose: tight wraps on power cords trap heat and make cables harder to swap.
Step 6: Build the vertical path
Cables that need to reach the floor or the wall outlet should follow one vertical path. A split sleeve gathers them into a single tube; an adhesive J channel works well along the back edge of the desk. Use a few cord clips on the desk surface to keep the mouse, headset and charging cables where you want them.
Step 7: Label both ends
Mark each power cord near the plug with tape or a small tag ("PC", "monitor", "speakers"), so you never have to trace cables by hand. A label maker would break the budget; tape and a pen are enough.
Step 8: Test and inspect
Plug the surge protector into the wall, power everything on and check each device. After a gaming session, feel the cords: a hot cord means overload. Make sure nothing hangs where a chair or your feet can snag it.
As for the inside of your PC case, internal routing is its own topic and depends on your case and components; follow your case manufacturer's documentation.
Standing desk: plan for movement
A sit-stand desk changes height, so every cable that runs from the desk to the floor or wall needs slack. UPLIFT Desk's setup guide recommends the same zone approach used above (vertical path, tray, clips) and two habits worth copying:
- Leave slack in the vertical run and don't tension anything between the desk and the floor.
- Test the full range of travel before you trim or secure anything permanently: raise the desk to its highest position, lower it to the lowest, and watch for cables that pull, pinch or catch on the frame.
Attach the tray to the desk itself and rest the surge protector inside it, so both move with the desk, and let only one bundle travel to the wall.
Mounting a power strip under your desk
Screwing a power strip under the desktop is a common idea, but be careful here. UL's guidance for relocatable power taps says they should not be permanently attached to a table or run through walls or floors. If you do mount one, follow the manufacturer's instructions and use only the mounting holes the manufacturer provides, if any. Resting the strip in a tray is the simpler option, and it lets you pull it out for inspection.
How we researched this
This guide is built on published safety guidance from the U.S. Consumer Product Safety Commission (CPSC), UL Solutions and the Office of Congressional Workplace Rights (OCWR), on manufacturer product pages and safety information, and on a standing desk maker's cable management guide. NexaRig has not tested the products listed here; they were selected from the sourced categories above. Prices and product details were checked on September 25, 2026, and may have changed since.
FAQ
Is it safe to put a surge protector in a cable management box?
It can be, with a box designed for it. Bluelounge says its CableBox fits a UL power strip up to 15" x 5¼" x 2½" and uses flame-retardant plastic, and it also notes that bundled cables produce heat. Don't overload the strip and don't enclose bulky power adapters.
Can you plug a power strip into another power strip?
No. UL's guidance is to plug a power strip directly into a wall outlet, never into another strip, and the OCWR warns against these "daisy chains" too.
Can I mount a power strip under my desk?
UL advises against permanently attaching a power strip to a table. Follow your product's instructions and use only the mounting holes its manufacturer provides; otherwise, rest it in a tray.
How much cable slack do I need for a standing desk?
There is no single number: it depends on your desk's height range and where your outlet is. Leave enough slack for the highest position, then test the full travel before securing anything.
Are Velcro ties better than zip ties for cable management?
For a gaming desk, usually yes. Hook-and-loop ties are reusable and easy to open when you swap a cable, while zip ties have to be cut.
Looking for more ideas? Browse all our setups guides.
Sources
- U.S. Consumer Product Safety Commission (CPSC), extension cord safety publication No. 5032, April 2012.
- CPSC, "CPSC and NESF Urge Consumers to Plug Into Electrical Safety," May 25, 2000.
- CPSC and Electrical Safety Foundation International (ESFI), extension cords and power strips fact sheet, around 2009.
- UL Solutions, "Guide to Power Strips and Surge Protectors."
- UL via IAEI Magazine, "Can Power Strips Be Daisy-Chained or Plugged Directly Into a Wall Receptacle?", March 2002.
- U.S. Office of Congressional Workplace Rights (OCWR), "Power Strips and Dangerous Daisy Chains."
- Apple, "Important safety information" (MacBook Air user guide).
- UPLIFT Desk, "Cable Management for Standing Desks: A Complete Setup Guide," September 5, 2025.
- Manufacturer product pages: Bluelounge CableBox and VELCRO Brand ONE-WRAP ties, consulted September 25, 2026.
This article is based on sourced research, without direct testing by NexaRig. How NexaRig labels its articles.
NEXT // CONTINUE YOUR RUN